
What Is Dye Penetrant Testing & Inspection? What You Need to Know
Dye penetrant testing and inspection is a commonly used method of detecting surface-breaking defects in non-porous materials. Its applications are myriad, and could well be a useful method for measuring the health of your own industrial assets. If you want to find out more about dye penetrant testing – and how it could potentially benefit your business – read this guide from The Lab team now…
Definition: what is dye penetrant testing?
Dye penetrant testing is a non-destructive test that reveals flaws open to the surface of non-porous materials, such as metals.
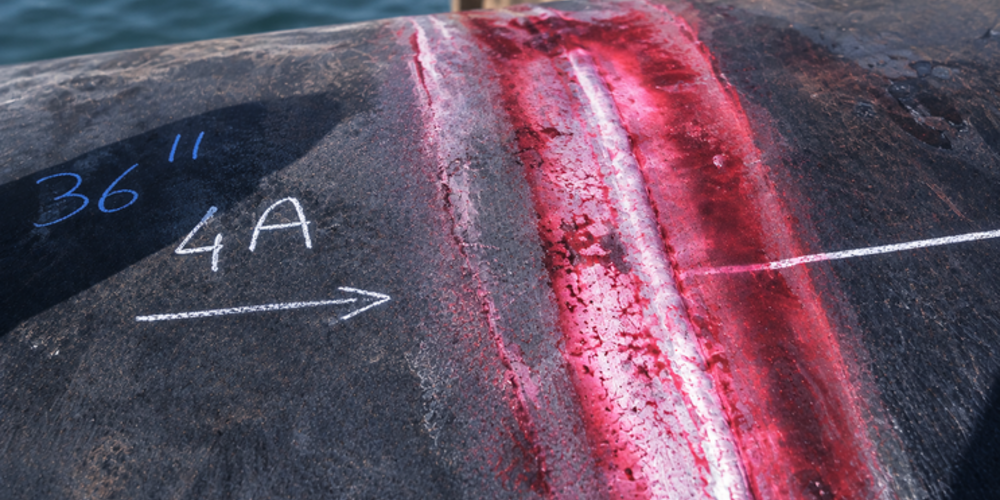
A coloured or fluorescent liquid seeps into the flaw, the excess is removed, and a white developer draws the liquid back out to reveal it. The liquid is drawn into cracks by capillary action, like water rising up a narrow tube. The developer works like blotting paper, lifting the trapped liquid out and spreading it across the surface.
This “bleed-out” makes the indication look wider than the crack itself.
Dye penetrant testing is also known as ‘dye penetrant inspection’ (DPI), liquid penetrant testing, PT or a dye penetration test.
How does dye penetrant testing work, step-by-step?
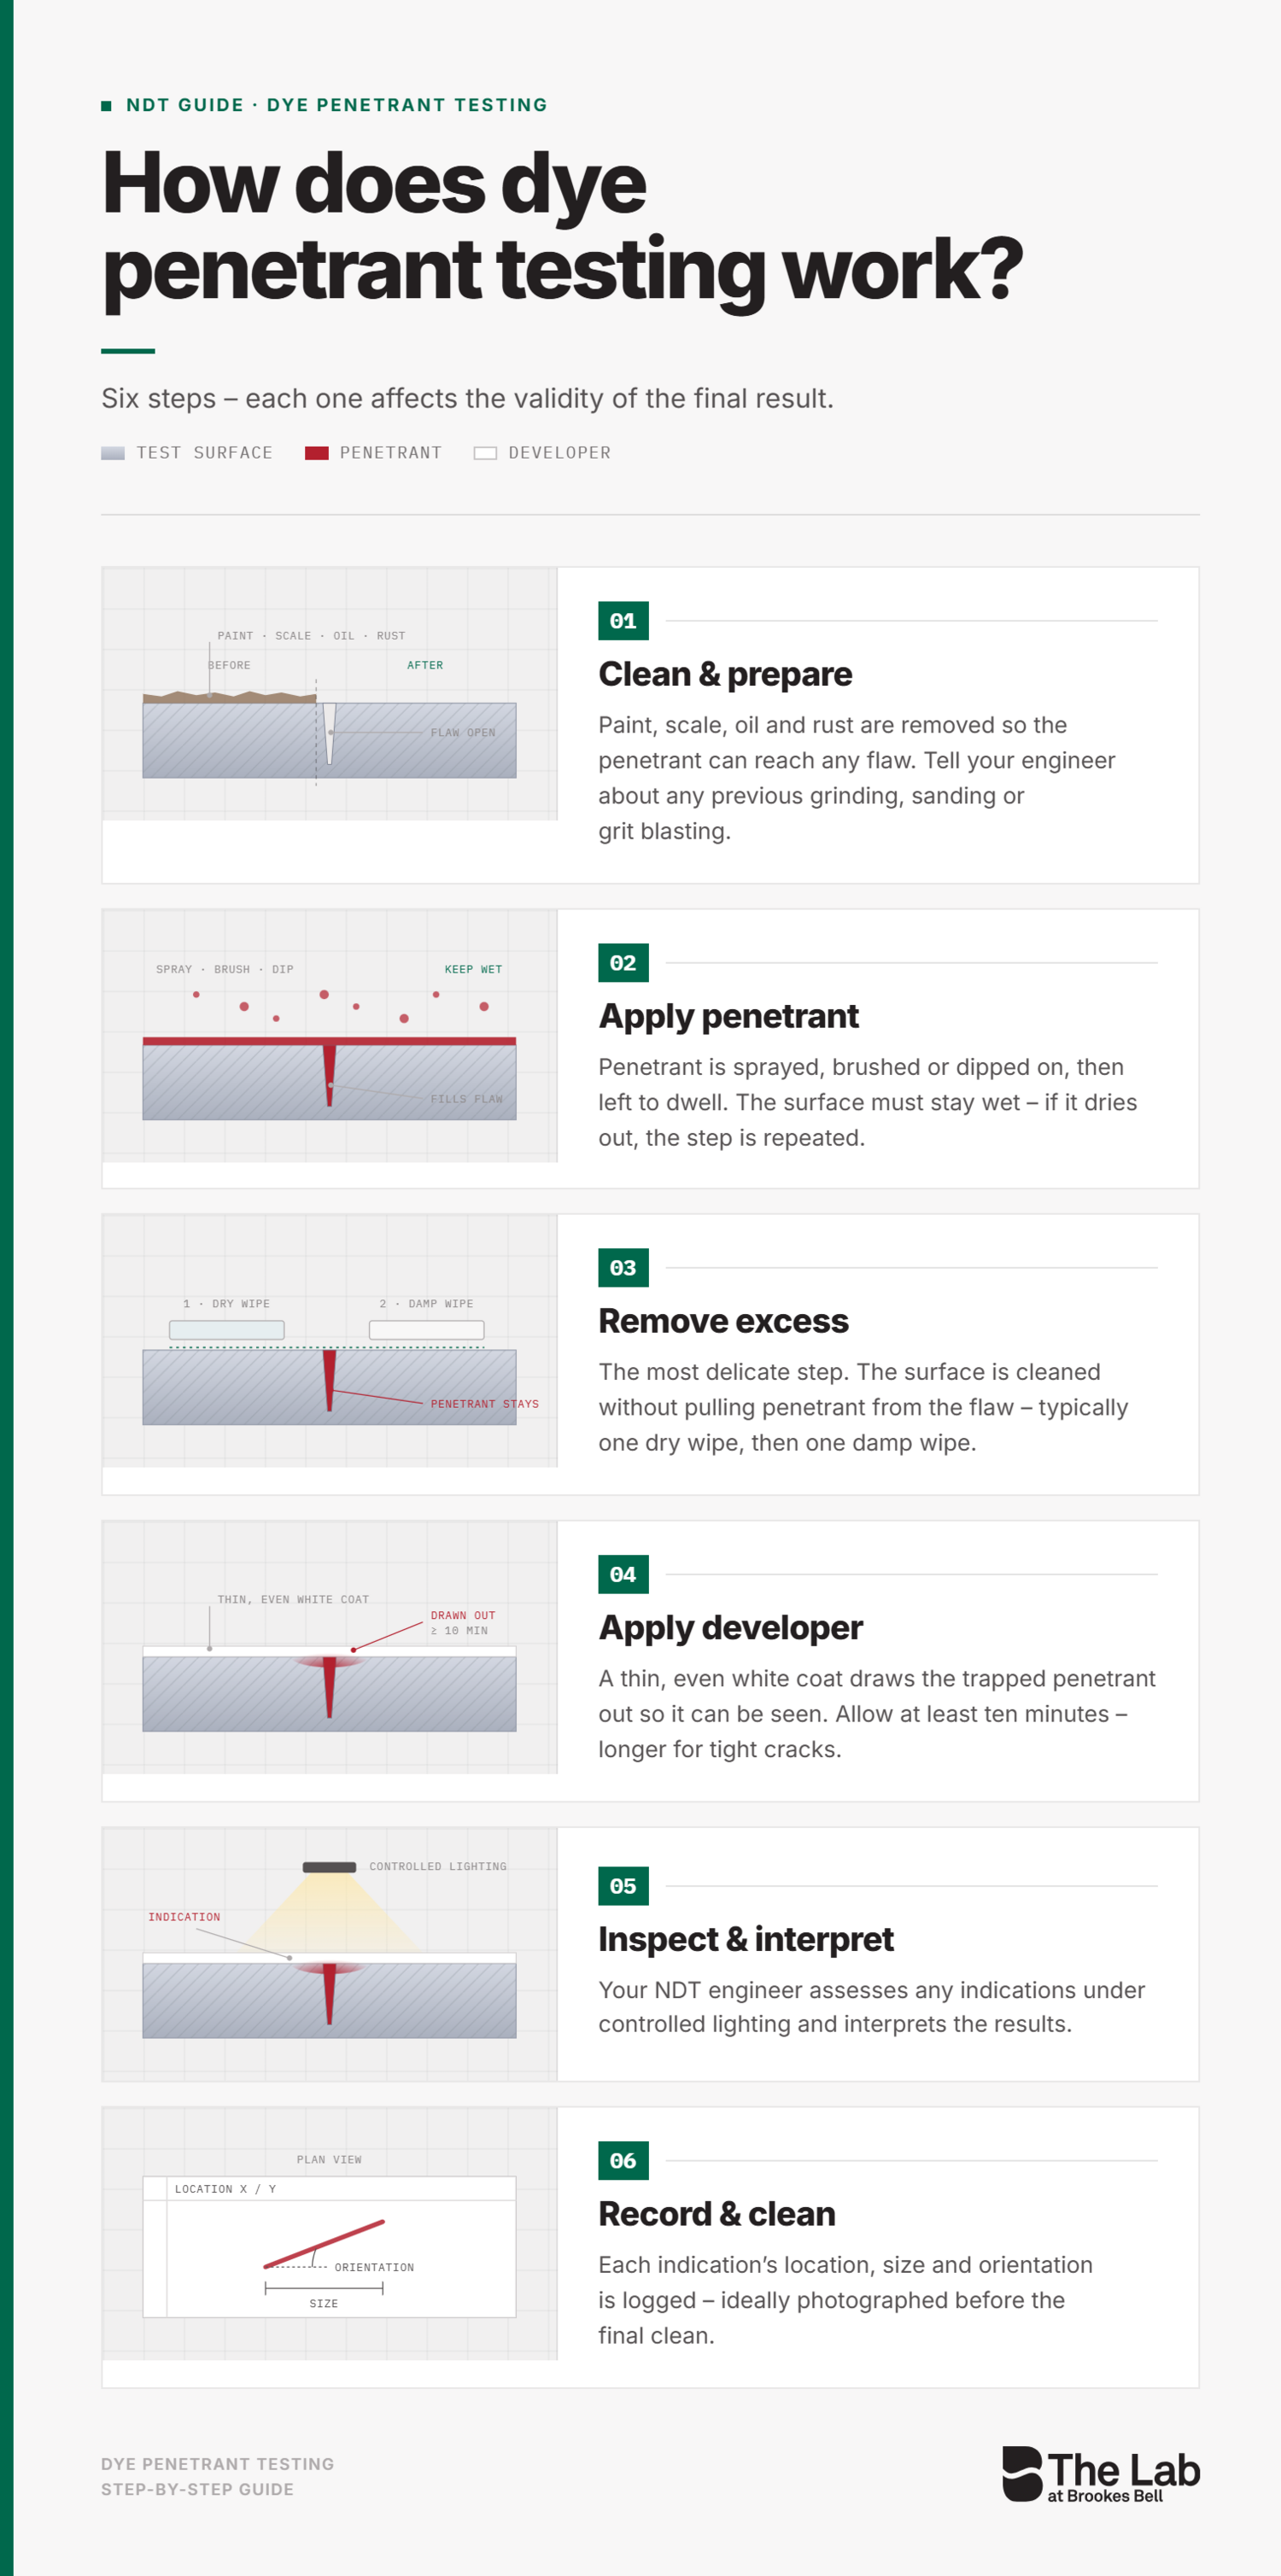
Dye penetrant testing tends to follow six steps – with each step having important implications for the overall validity of the end results.
Cleaning and preparation of the surface
Your NDT engineer will begin by preparing the surface to be tested – removing paint, scale, oil, and rust so the liquid can reach any flaw. It’s important that you inform the engineer of any previous grinding, sanding or grit blasting that has been applied to the surface.
Application of the penetrant
The penetrant is sprayed, brushed, or dipped onto the surface, then left to dwell. Minimum dwell times can vary depending on the material and the flaw. If the liquid dries out, the process must be repeated, so a careful engineer keeps the surface wet.
Removal of excess
This is arguably the most delicate step, and it relies on the engineer’s skill: the surface must be cleaned without taking penetrant out of the flaw. With solvent, one dry wipe followed by one damp wipe is typically carried out.
Application of the developer
A thin, even coat of white developer is used to draw the trapped penetrant out and spread it so it can be seen. Development usually takes at least ten minutes (although it can be longer for tight cracks).
Inspection and interpretation
This is where the experience of your NDT engineer is paramount. Your specialist will assess any indications under controlled lighting and interpret the results from there.
Recording and cleaning
The final report will log each indication’s location, size and orientation, ideally with photographs taken before the final clean.
Where is dye penetrant testing used?
As we said at the outset of this article, dye penetrant testing finds use in myriad contexts. Below, we’ve set out some of the most common settings in which it is used as well as its ideal application types.
What it finds
Dye penetrant testing finds flaws open to the surface: cracks, laps, folds, porosity, and lack of fusion, including fatigue and grinding cracks. Anything buried stays invisible, however.
Materials it suits
It suits most non-porous materials: steel, stainless steel, aluminium, titanium, nickel alloys, ceramics, and glass, but not excessively porous materials. On stainless steel, titanium and nickel alloys, penetrant materials need certified limits on sulphur, chlorine, and fluorine.
Sectors and assets
Dye penetrant testing is widely used across many industries, with some industries (such as maritime expressly requiring its use for certain cases).
-
Maritime: class societies have required the use of dye penetrant testing on propeller casings, and under DNV, 20% of critical-area fillet welds must be checked by this method. Fillet welds matter because one TWI study reported that 90% of weld defects occur in them, and radiography cannot examine them1.
-
Energy: in a 1979, a US nuclear plant found leaks at stainless steel pipe welds. Penetrant tests confirmed cracks right through the pipe wall.
-
Aerospace: penetrant testing is typically used on engine turbine blades, where one crack could be disastrous.
-
Automotive: the method is used in many instances in the automotive industry.
-
Space: believe it or not, NASA lists the Saturn, Apollo, Skylab, and Space Shuttle programmes as having made use of penetrant testing.
Should dye penetrant testing be done on site or in the laboratory?
This is a common question we receive here at The Lab. Where is dye penetrant testing best carried out? The answer depends on a number of factors that we’ve outlined below.
Factor | On Site | In the Laboratory |
Temperature | Weather-dependent; 10-50°C limit | Controlled |
Lighting | Hard to darken | Darkened rooms available |
Sensitivity | More operator-dependent | Higher, more repeatable |
Access | Reaches tanks and tight spaces | Part must be removed |
Turnaround | Results during the visit | Booking, transport, reporting |
Forensic follow-up | Screening and crack mapping | Full microscopy and sectioning available |
Choose on site when…
The asset cannot be moved, you need to map cracks before removal, or you want results during the visit.
Choose the laboratory when…
You need maximum sensitivity, batches, removed or failed parts, or a controlled environment.
The Lab offers dye penetrant testing both on site and in our laboratory, where we can follow up identified cracks with microscopy and sectioning. Tell us about your asset and we will advise on the best approach.
What mistakes and safety risks should you watch for?
Like any technique, dye penetrant testing can be subject to mistakes and errors that can compromise the end results. Below, we’ve set out the key mistakes and risks to look for.
Common errors
Typical errors include poor pre-cleaning, a short dwell, over-washing, the use of poor lighting, conducting the test in temperatures outside 10-50°C, and misread indications.
Safety and environment
Many penetrant materials are flammable. In confined spaces such as tanks, this can result in potentially dangerous/harmful atmospheres. Likewise, UV-A lamps can burn skin and cause eye damage.
Material compatibility
As we stated earlier, certain materials such as stainless steel, titanium, and nickel alloys need low-sulphur, low-halogen penetrant materials. This is because chloride, fluoride, and sulphur residues can cause cracking and corrosion.
How much does dye penetrant testing cost?
A common question we receive here at The Lab is how much dye penetrant testing costs. The answer is it depends.
The amount you pay can be influenced by a huge variety of factors, including:
-
Access – potentially including scaffolding, rope access, and confined-space support.
-
Surface preparation, including paint and rust removal.
-
Extent of coverage – for example the percentage of the weld length that needs to be tested.
-
Site versus laboratory work.
-
Mobilisation and travel.
-
Urgency.
-
Reporting depth and witnessing requirements.
It’s for these reasons (and more) that there isn’t a ‘standard price’ for dye penetrant testing. In order for us to provide an accurate quote, a clear scope of work is imperative: what, where, when and to which standard.
How is dye penetrant testing used in failure investigations?
Failure investigations are used to assign probable causes and protect similar parts. Penetrant testing can be used in failure investigations – particularly early in the investigation sequence – amongst the non-destructive checks made before anything is cut.
Below, we’ve set out the ways in which penetrant testing is commonly used in failure investigations.
Mapping the damage
Penetrant testing can map surface cracking around a failure, and indications guide where to section.
Screening and repairs
Investigators check similar components for the same fault. After repair, penetrant testing confirms the whole crack is ground out.
Dye penetrant testing FAQs
Below are some of the most frequently asked questions about dye penetrant testing.
What is the difference between dye penetrant and magnetic particle testing?
Magnetic particle testing needs ferromagnetic steel and also can find near-surface flaws. Penetrant testing also works on non-magnetic metals, but only finds surface-breaking flaws.
Can dye penetrant testing be used on aluminium, stainless steel, and welds?
Yes. It suits most non-porous metals and welds, but stainless-steel needs low-sulphur, low-halogen penetrant materials. Machined aluminium may need etching to reopen smeared cracks.
Is dye penetrant testing destructive?
No. It is non-destructive, so the part is not damaged, but residues must be cleaned off because they can attract moisture and cause corrosion.
What is a Type 1 and Type 2 penetrant?
Type 1 is fluorescent, and viewed under UV-A in a darkened area, and generally finds smaller flaws. Type 2 is colour contrast, usually red, and viewed in white light.
Commission dye penetrant testing today
If you need dye penetrant testing to ascertain the integrity of your asset, then look no further than The Lab.
As one of the UK’s leading forensic laboratories, we have provided dye penetrant testing across a range of industries including maritime, energy, manufacturing and more.
Speak to The Lab about your testing requirements now
For more information and the latest industry insights, explore The Lab’s News and Knowledge Hub…
Is It Possible to Create Carbon-Neutral Steel? | Ultrasonic Testing: What You Need to Know | What Is Additive Manufacturing?
Footnotes:
1. TWI. A Review of NDE Methods for New-Built Ships Undergoing Class Inspection [online]. Available at: Amirafshari_etal_JSPD_2017_A_review_of_NDE_methods_for_new_built_ships_undergoing.pdf (Accessed on 6th October 2026).
- Date
- 08/10/2026